Anyway, on to better things. I was hoping to make this post earlier today to share how I made the card featured on May 22. It is actually VERY simple, but OH so cute.... I am including quite a few pictures, so please be patient. I hope you enjoy and I would love for everyone to start sharing their creations with me.. I LOVE to see others perspectives on different techniques....
So, without further, ado......
I have absolutely fallen in LOVE with this paper pack, Mayberry... The sad thing is, I used up the rest of this particular paper today. So, guess I will be buying another kit shortly since I have more projects in mind..
You can make three cards from ONE 12 x 12 sheet of pattern paper. In the end, you will end up with a 4 1/2 x 4 1/2 card.
To begin, you are going to cut THREE 12x4 strips from your 12x12 pattern paper.
You are going to score on both the 4" and 8" score lines
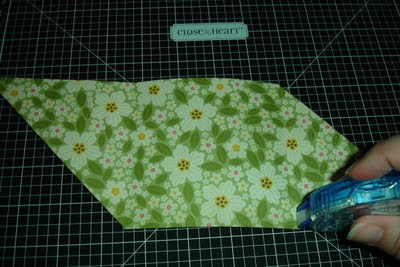
Once you have scored your pattern paper, go ahead and fold on the score lines. Depending on which side of your pp you want to show on your card, flip the paper so that the preferred side is upside down on the table. You are then going to fold he two outer squares in on themselves and opposite of eachother, so that you see the side of the paper that is going to be apart of your card. Doing this, you are forming the pocket and door of your card.

You can then attach your pattern paper to your card base. You will want to choose TWO different colored pieces of cardstock. The base will measure 4 1/2x 4 1/2 and the mat will measure 4 1/4x 4 1/4. Attach your pattern paper to the mat, then cut your ribbon just long enough wrap 1/2" around both sides of the mat. Attach the ribbon to the PP and Mat BEFORE attaching to the card base.
The insert of the card measures 3 1/4x 3 3/4. You want the base to match the mat on the cover of your card and then I always use either white or colonial white card stock on the insert to either stamp a sentiment to write my message. This insert pulls out for the receiver to read, it is NOT attached to the card.
Decorate the front however you wish. Just make sure that you have a means to secure the cover shut, as it loves to flip open. I used my spellbinders to cut out the ovals that my sentiment is stamped on and a Martha Stewart Butterfly punch that I embellished with CTMH opaque pearls and then attached with CTMH foam tape.

I hope my instructions were detailed enough, as this is my first instructional post. I look forward to your comments and input. This really is an easy card to make.
As Always.. Happy Crafting.....


No comments:
Post a Comment